Introduction
This guide will demonstrate how to setup your OMRON NA5 HMI for viewing and/or operation remotely with VNC (virtual network computing). This can be achieved with a local network connection or remotely via a modem.
Pre-Requisites
<add intercel modem relevant KB links>
Further Reading
<insert
OMRON NA User's Manual
List of NA5 Manuals
Procedure
Step1 - Create/Open HMI Project
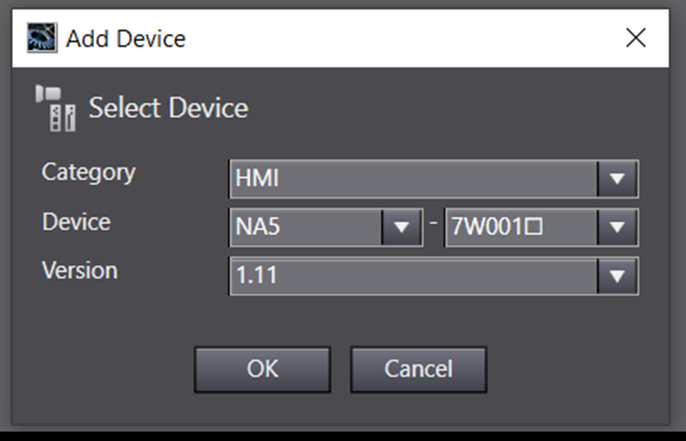
Open an existing or start by opening/adding an OMRON NA5 HMI device in Sysmac Studio. Under Insert -> HMI -> NA5 select the appropriate model number and version. This guide will use the NA5-7W001S version 1.11
Step 2 - Network Setup for Local OR Remote Connectivity
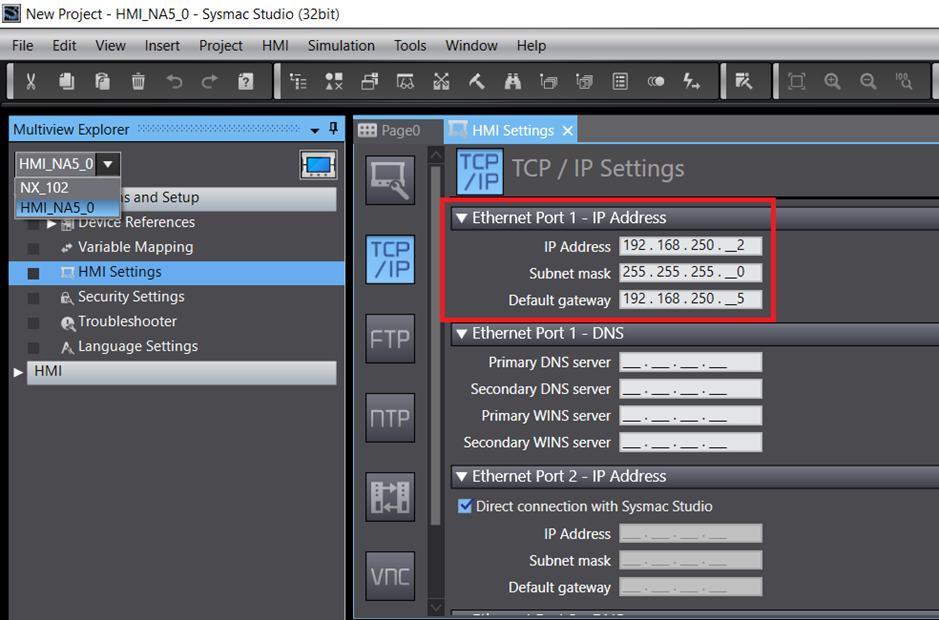
In the Multiview Explorer pane, click on the drop down menu and select the newly added/existing HMI_NA5_0 (default named device) device.
Under Configurations and Setup -> HMI Settings -> TCP/IP setup the IP address of the OMRON NA5 HMI. Note that the default gateway IP address is necessary if remote connection via a modem is required, The default gateway IP address is the IP address of the modem.
For connection via a modem, the IP address of the OMRON NA5 HMI must be port forwarded to port 5900. The example below shows the Intercel eSAM portforward settings.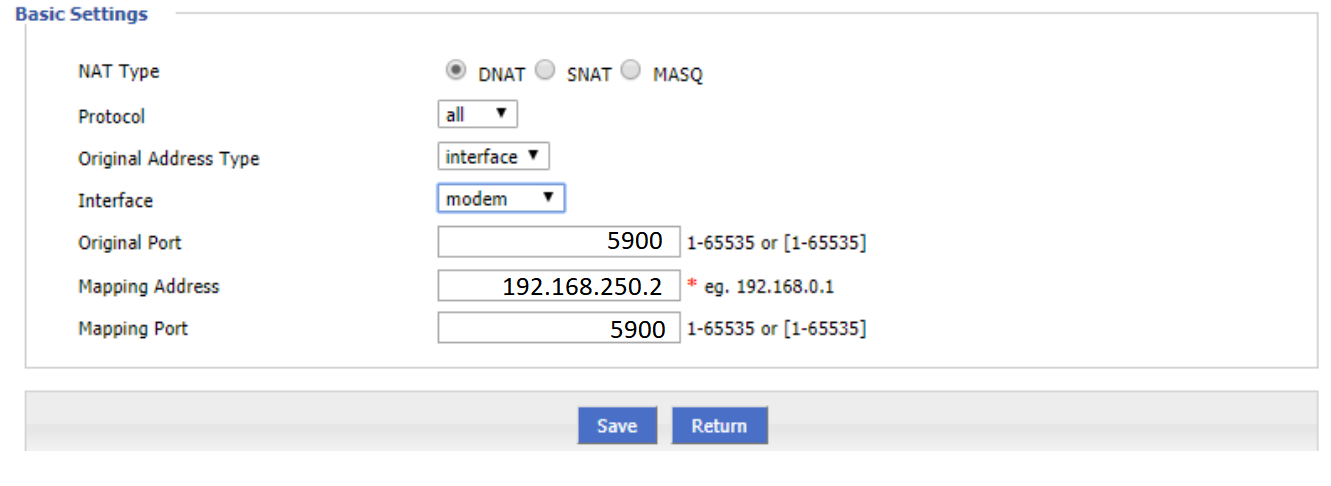 Intercel eSAM Port Forwarding User's Guide
Step 3 - Enable VNC Server
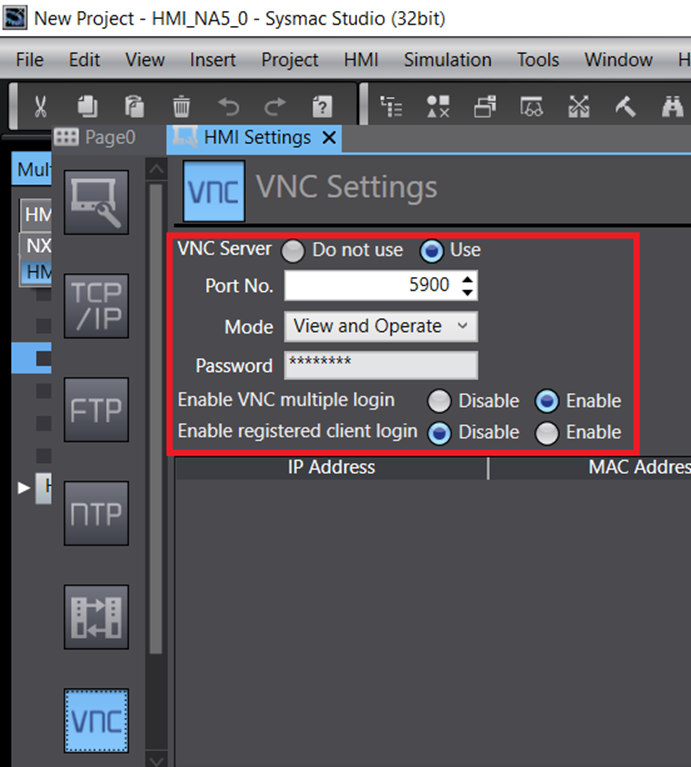
Under Configurations and Setup -> HMI Settings -> VNC select Use.
By default the port number for many VNC servers is 5900.
| Parameter | Setting |
|---|---|
| VNC Server | Use |
| Port No | 5900 (default) |
| Password | (Use desired password) |
| Enable VNC Multiple Login | Enable (Disable - for single user access) |
| Enable Registered | Disable (Enable - for registered client logins) |
Step 4 - Compiling and Synchronising to the NA5 Screen
After project completion with the enabled VNC settings build and apply these settings to the NA5 HMI.
To build, on the top menu click on Project -> Build HMI. Proceed to check and test the Communications Setup.
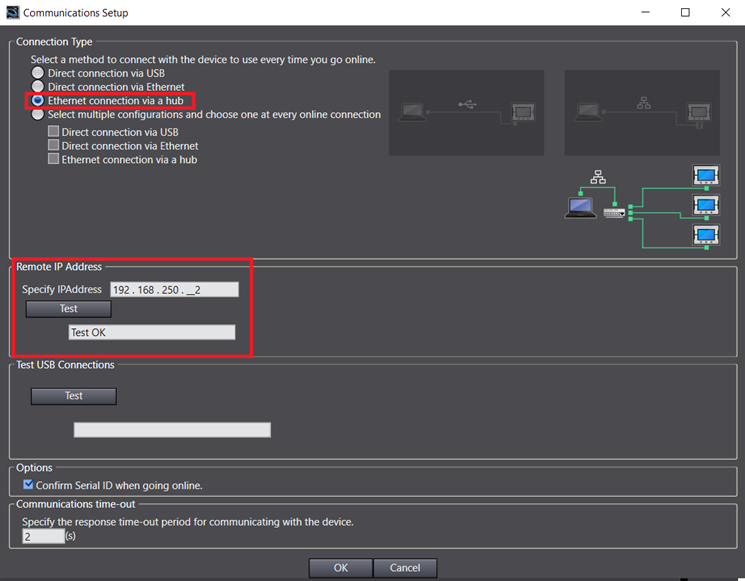
From the top menu, HMI -> Communications Setup. A communications setup window will pop up. Choose the appropriate Connection Type. For this example Ethernet Connection Via a Hub.
Under Remote IP Address set the Specify Address to the address of the HMI (for this example the screen was set to 192.168.250.2). Press Test and if connections are working the output will say Test OK. Click on OK to confirm the connection setup.
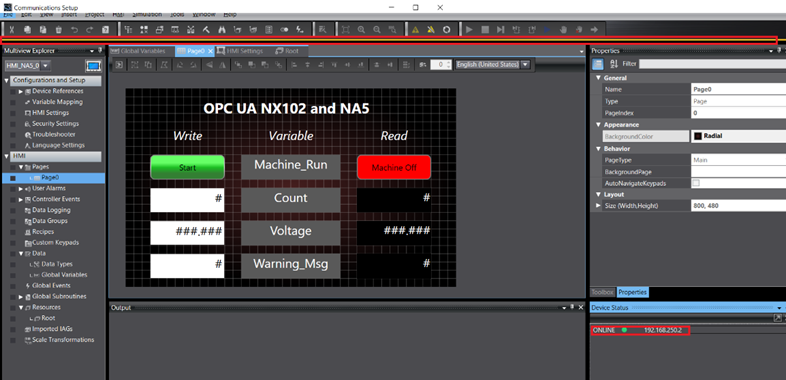
Work online - from the top menu HMI -> Online. The bottom right corner, under Device Status will indicate the ONLINE status of the HMI. The yellow bar at the top of the window also indicates an online connection to the device
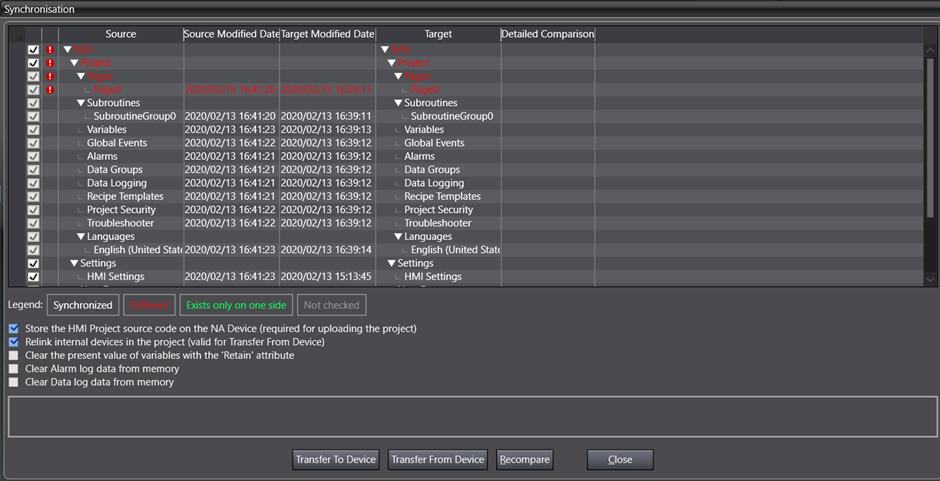
Once connected online apply the changes made in the project by synchronising. From the top menu, select HMI -> Synchronisation -> NA device. A window will popup showing differences (in red) between the project on Sysmac and the project on the NA5 device. To apply the changes click on Transfer to Device.
Step 4 - Testing with VNC Client
Download any free VNC Client software. This example uses VNC Viewer from RealVNC. Can be downloaded from here: https://www.realvnc.com/en/connect/download/viewer/
Run VNC Viewer:
For local network connection:
Type in the IP address of the NA5 device - in this case 192.168.250.2

For remote network connection via a modem:
Type in the IP address or dynamic dns URL of the modem

Note a warning window will pop up indicating the VNC server is not encrypted. Click Continue to confirm.
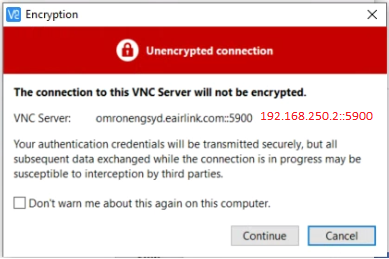 Encryption warning shows the VNC Server address. The above example shows the URL used for remote connection. Red text will show for local connection
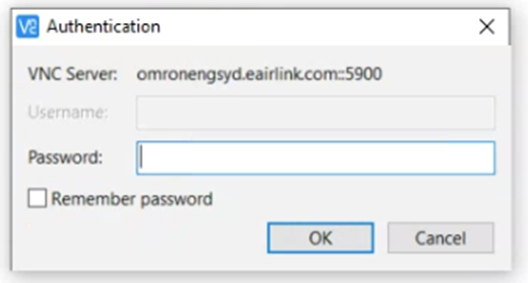
An authentication window asking for the VNC Server password will pop up. Enter the set password for the VNC Server in Step 3 then click OK
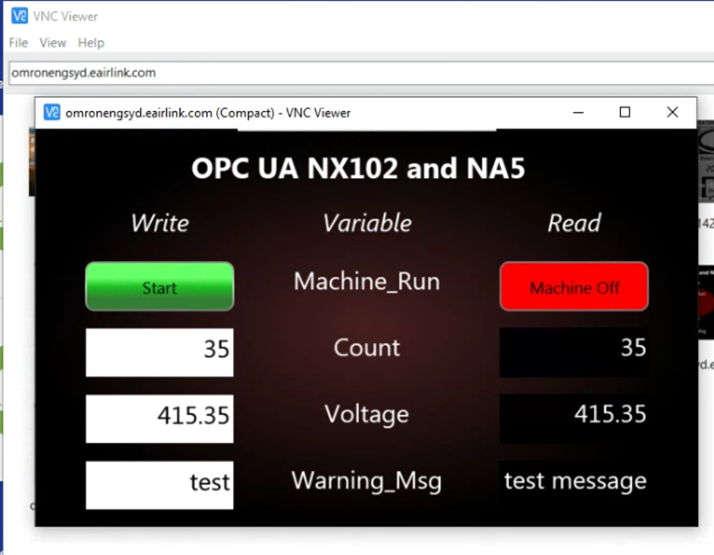
VNC Viewer will then display the exact same screen as the NA5. Depending on the settings of Step 3, if View and Operate was set - the mouse cursor will emulate your finger on the touchscreen. Test by changing pages, pushing buttons or changing values.
In summary, it is possible to view and operate systems fitted with the NA5 HMI remotely. This can be achieved at a local network level or remotely via a modem.