Introduction
The OMRON CP1W-CIF41 option board gives Ethernet(FINS) capability to OMRON PLCs. It is compatible with CP1L(Not CP1L-E), CP1Hs, CP1Es and the G9SP.
Setup
After mounting the option board on either Port 1 or Port 2, enable the usage of peripheral ports by enabling the respective dip switches as seen below.
For PLCs with more than 30 points I/O:
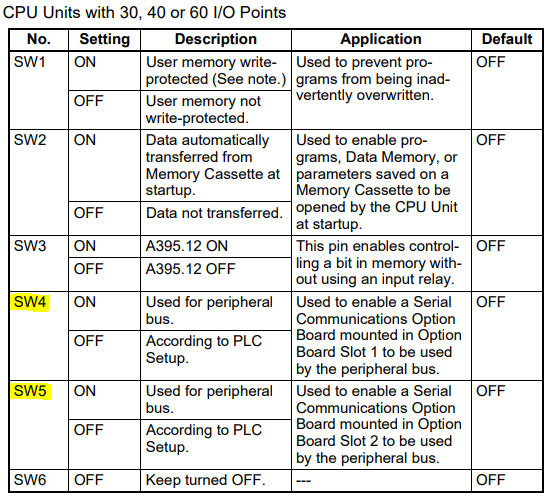
For PLCs with less than 20 points I/O:

The status words can then be accessed using CX-Programmer depending on the model of the PLC and the port mounted on:

The allocation of information is as of below:
n = DM32000 + 300×(0xFD - Unit Address)
| Address | Description | Size(bytes) |
| n | Mode setting | 2 |
| n+1 | FINS/TCP port number | 2 |
| n+2 | FINS/UDP port number | 2 |
| n+3 | IP address | 4 |
| n+5 | Subnet mask | 4 |
| n+7 | Reserved | 2 |
| n+8 | IP address table | 194 |
| n+105 | IP router table | 66 |
| n+138 | FINS/TCP connection setup | 22 |
| n+149 | HTTP Server Setup | 10 |
| n+154 | FINS node address | 2 |
| n+155 | Using IP Address Display/Setting Area | 4 |
For example, if a CIF41 card is installed on port 1 on a 30 point PLC, the IP address would show on D32003 and D32004.
At this point, the IP address is a display only area and cannot be written. The method to change IP address using CX-Programmer will be explained later in this article.
Changing the Settings through the Web Browser
By default, the IP address of the CIF41 is 192.168.250.1.
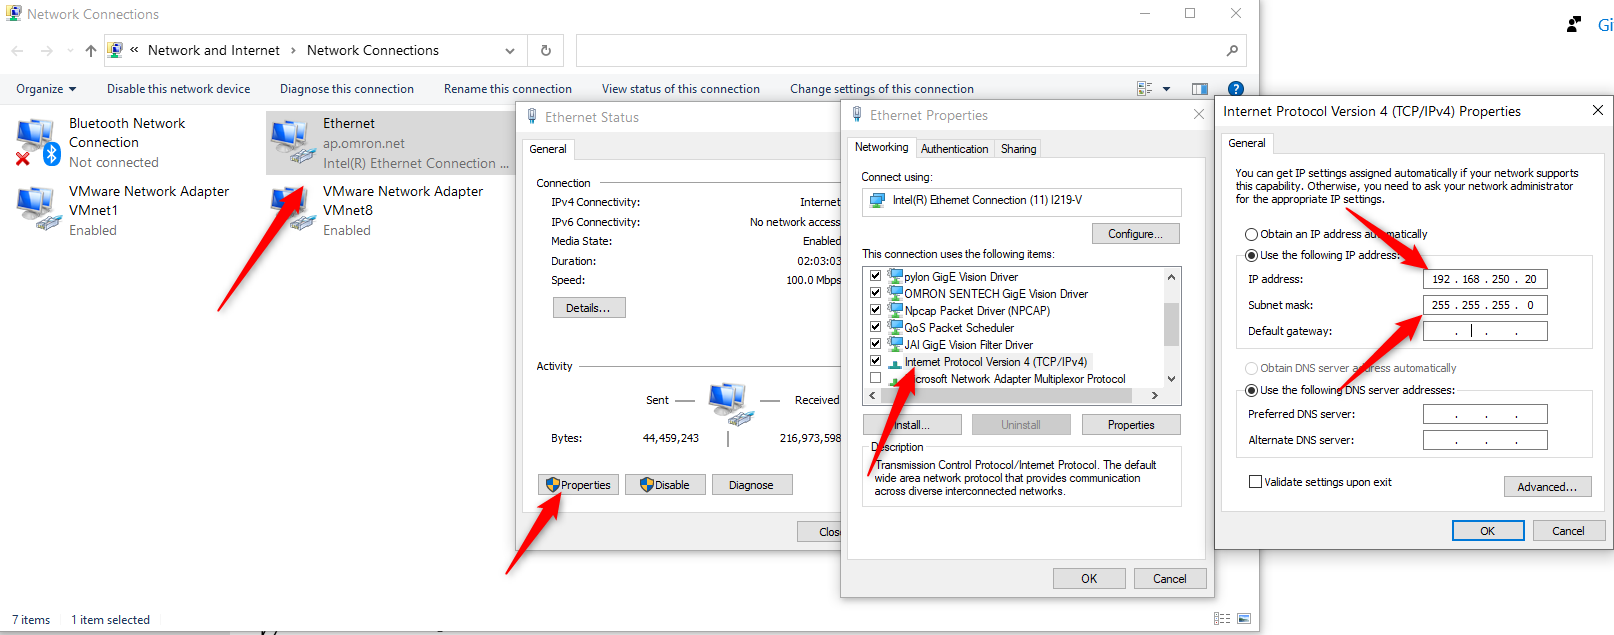
Change the IP address of your PC to have the same IP network of the CIF41 by going to the address as follow: Control Panel\Network and Internet\Network Connections
- Click on the Ethernet port intended for use.
- Select Properties.
- Select Internet Protocol Version 4(TCP/IPv4).
- Change the IP address to 192.168.250.20 and the Subnet mask to 255.255.255.0.
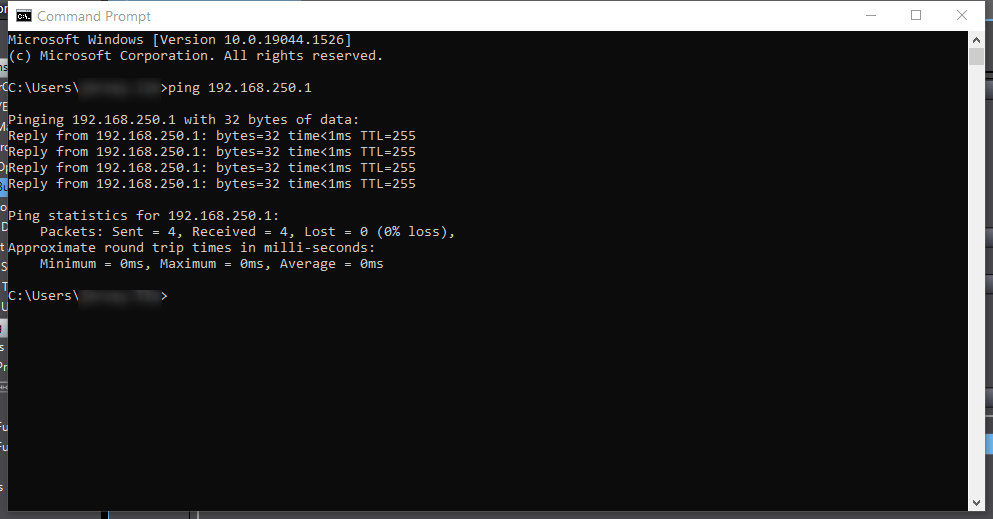
- Open cmd and type in "ping 192.168.250.1". The following screen shows when the CIF41 option board is responding to the PC, indicating that the PC is able to communicate with the CIF41 option board.
- Start Internet Explorer and type in 192.168.250.1/E00.htm (E00 for English, J00 for Japanese, C00 for Chinese)
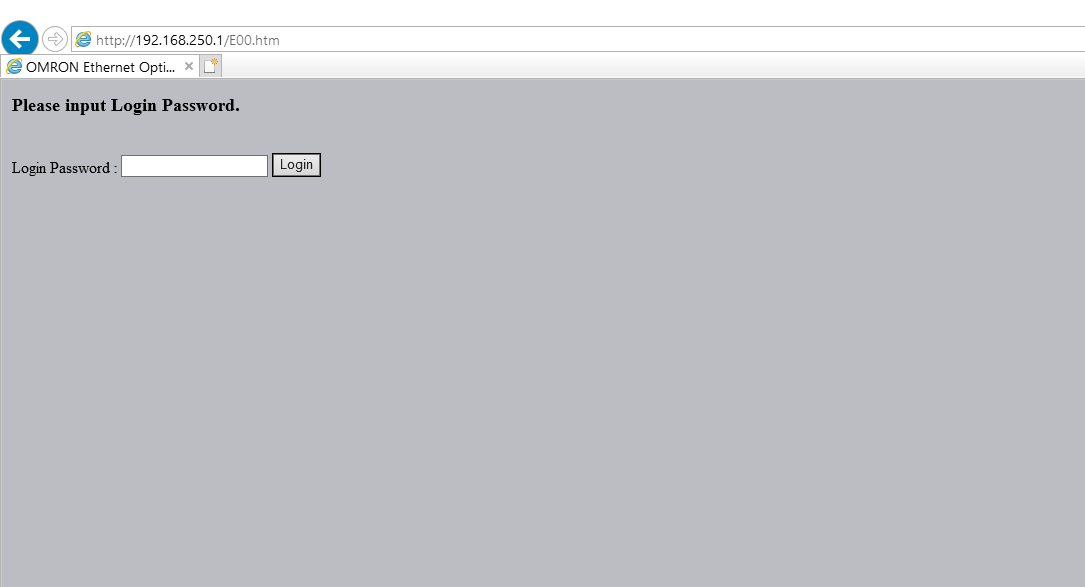
- Use "ETHERNET" when a login password is prompted. Next, click on "Settings" and "System".
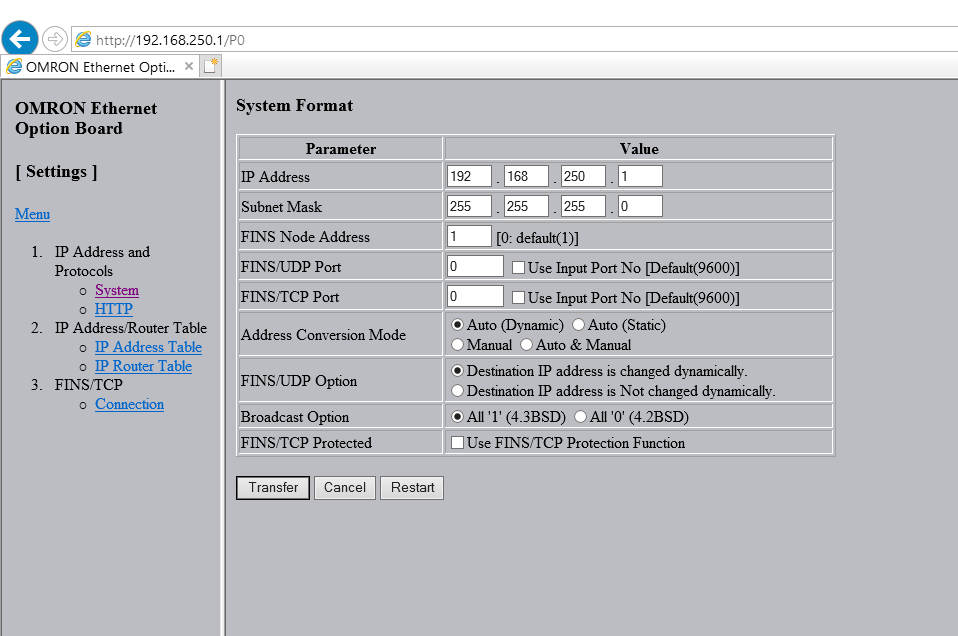
- When the IP address is changed to 0.0.0.0, CX-Programmer is given access to change the IP address from n+3 in the memory area. Otherwise, the changes here will reflect into n+3 in the memory area.