Scenario
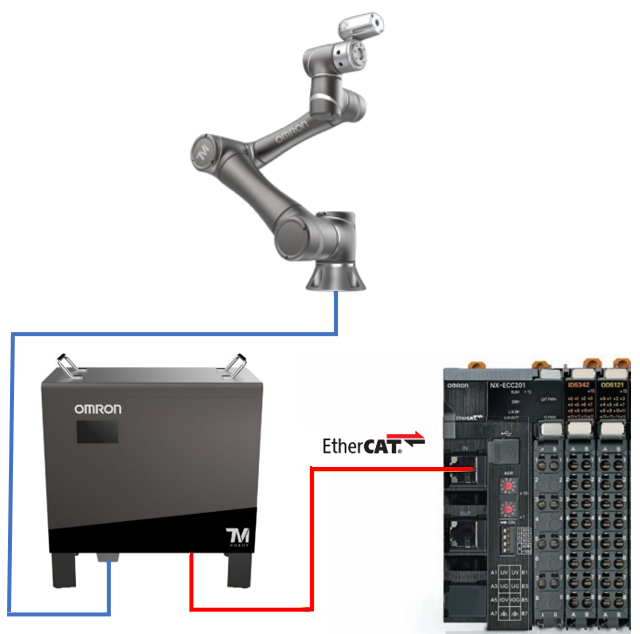
You would like to add a EtherCAT remote I/O to the Cobot.
Issue
A potential issue you may encounter when connecting a slave unit to the TM robot, is that when the coupler has been used before it already has a hardware configuration stored in its memory and therefor will not connect to the TM robot successfully.
Below is a guide for when you connect a used or a new EtherCAT slave coupler to the TM robot:
Connecting a new coupler
When you get a new coupler from the factory it does not hold any hardware configuration memory. So when you slot the supported IO cards onto the coupler and power it on for the first time the coupler will scan the connected units and store the hardware configuration in its memory.
Because of this reason you don't need to do any setup or commissioning of the coupler before connecting it to the TM robot.
DeleteConnecting a used coupler
When you want to use a coupler that was previously used and paired with IO cards. The coupler will still have the memory of the hardware configuration stored and will need to be changed to suit the new configuration with the supported cards for the TM robot.
Below we describe how you will need to do this:
Sysmac Studio EtherCAT Coupler Setup
- Start a new Sysmac Studio project with any PLC.
- Add the coupler with the correct revision number to the EtherCAT network
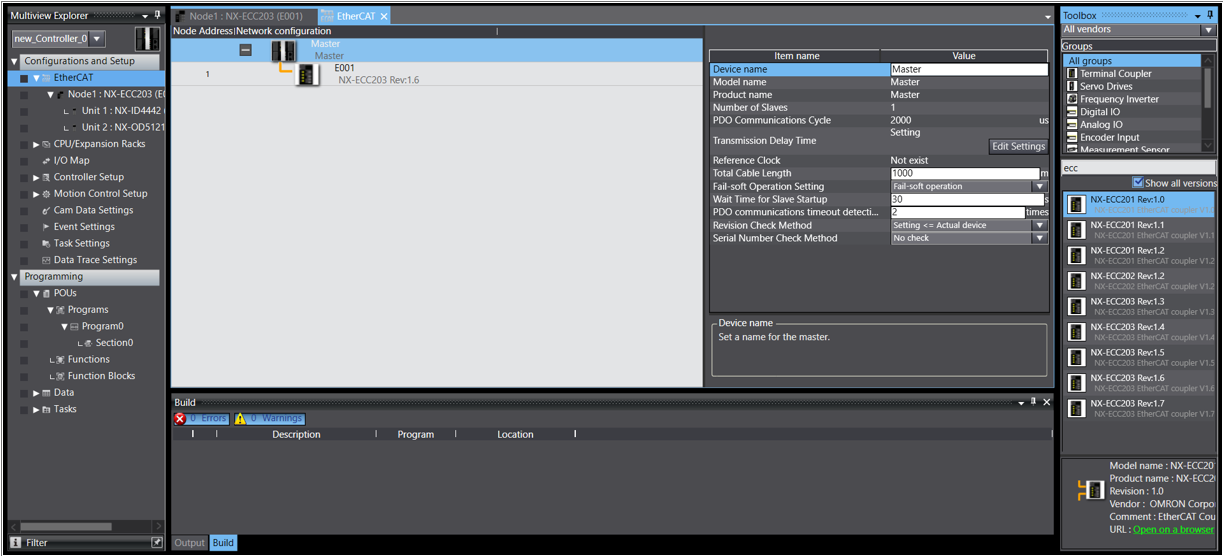
- From the Multiview Explorer, double click the coupler in the EtherCAT network.
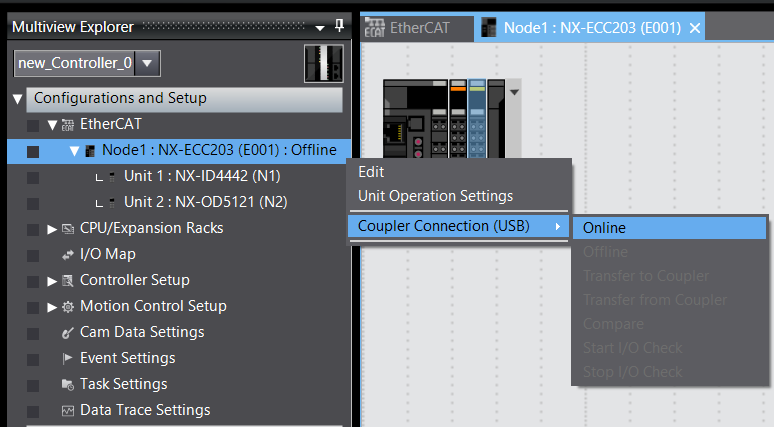
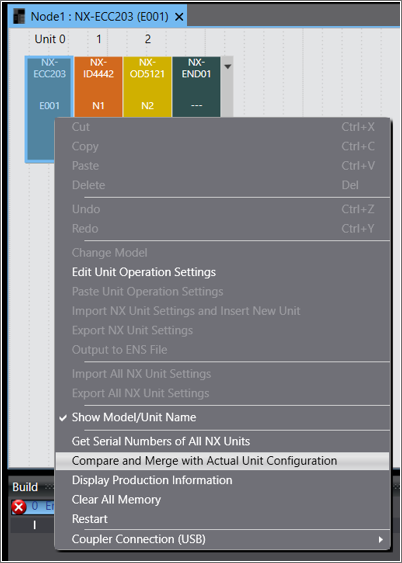
- Right click on the coupler and go Online with the coupler directly via USB
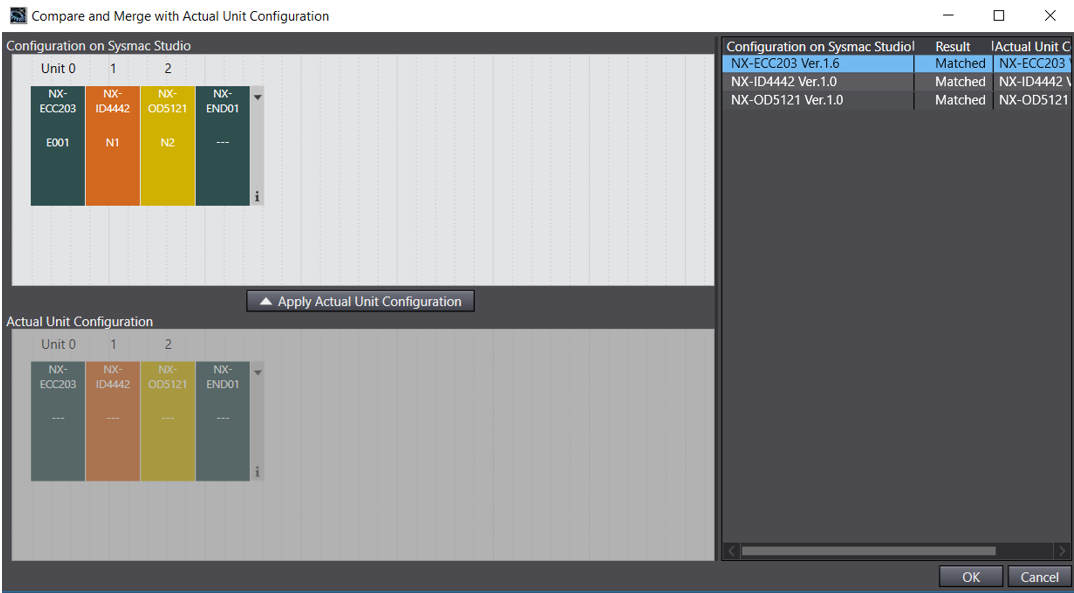
- Select compare and merge to add the NX IO Slices to the Sysmac Project.
- Click Apply the Actual Unit Configuration
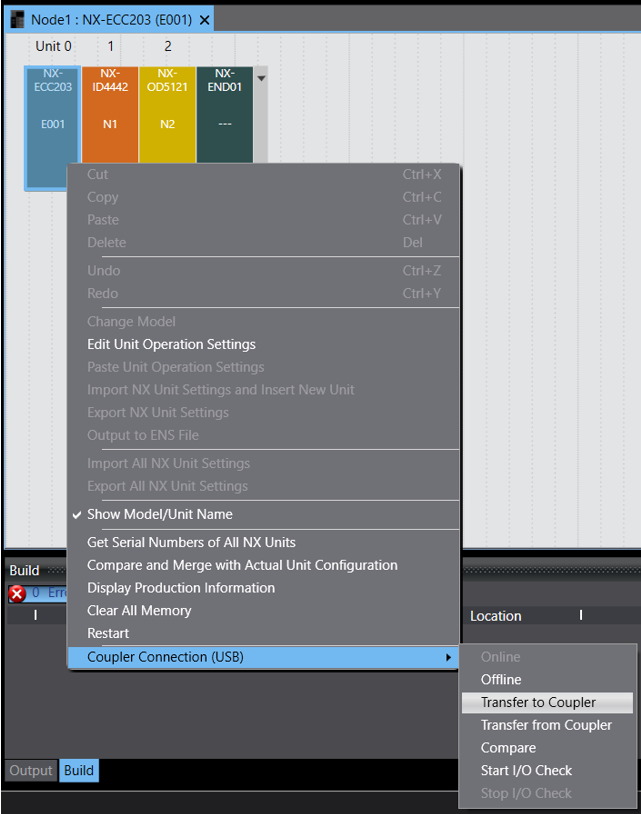
- Transfer the configuration to the coupler by right clicking on the coupler and under Coupler Connection(USB), select Transfer to Coupler
- Now that the coupler's hardware configuration has been changed to suit the supported configuration for the TM robot. Proceed with the guide outlined in the solution section.
Solution
Coupler |
Input Cards |
Output Cards |
|---|---|---|
NX-ECC201 |
ID4442 |
OD4121 |
NX-ECC202 |
ID5342 |
OD5121 |
NX-ECC203 |
Supports an additional 128 Inputs and 128 Outputs.
Supported TM Controller Hardware Version : 1.x/2.x/3.x
Supported TM Controller Software(TMflow) Version : 1.76 and later
Getting started:
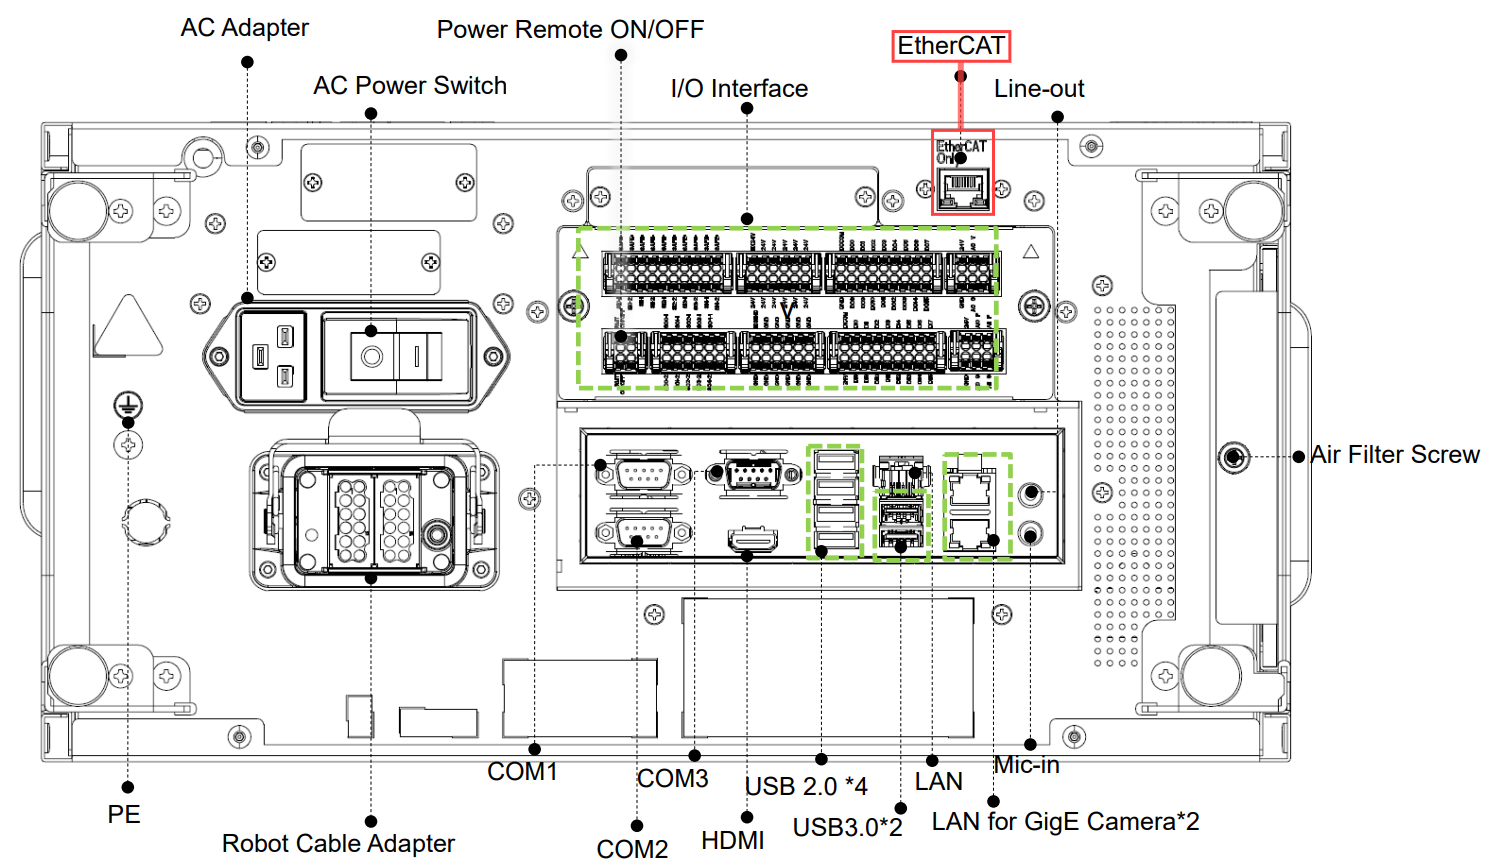
- Adding a slave unit to the TM Hardware and Software is as easy as connecting the coupler to the EtherCAT port in the TM controller while powered off.
- When the controller is power on again the controller will automatically scan the coupler hardware configuration and apply it to the TM software.
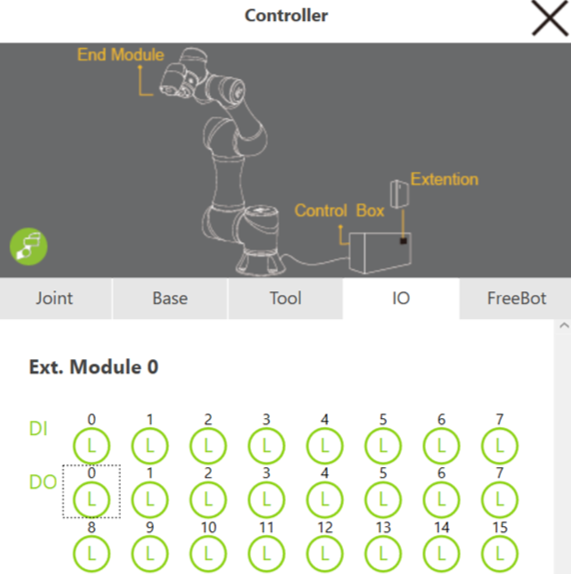
- Next open TMflow and navigate to the Controller IO. The IO slices are now available for use in the Extended IO Section.
- In this example, one 16 channel output slice, and one 8 channel input device is used.