Images captured by the FHV7 smart camera or FH controller can be saved on a external storage space on its network.
Logging via Shared Network Drive
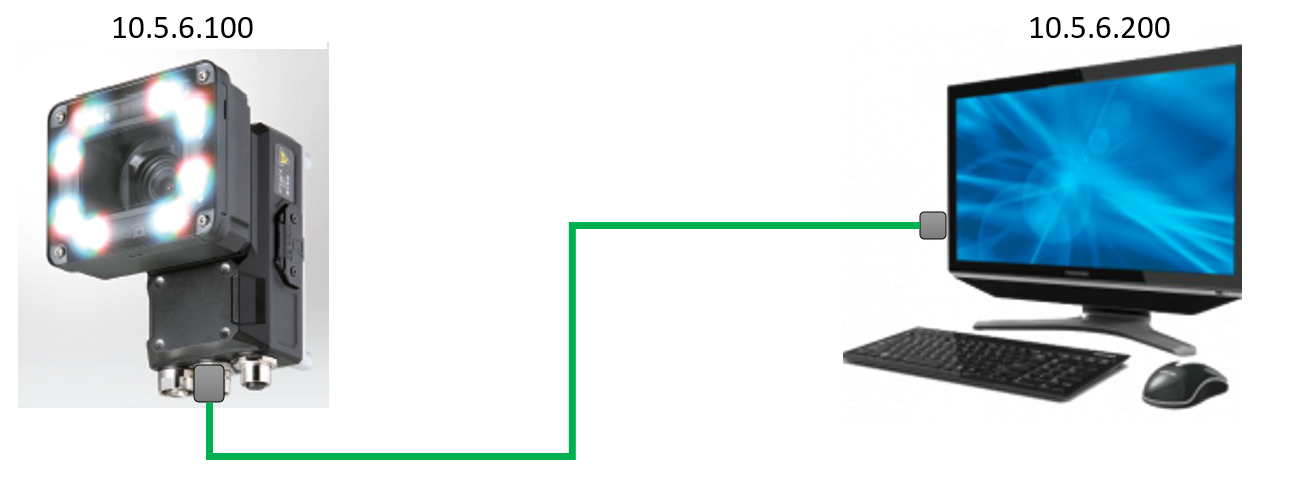
- Both FHV7/FH and destination PC must be on the same subnet. Here the subnet is 10.5.6.xxx.
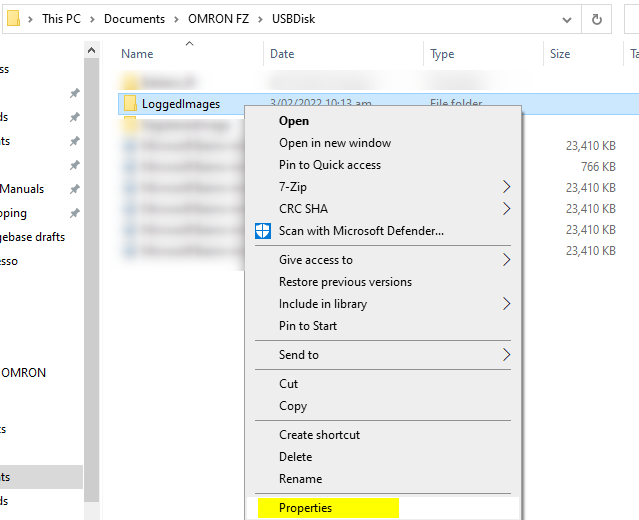
- Create a new folder on your PC then right-click on the folder and select Properties.
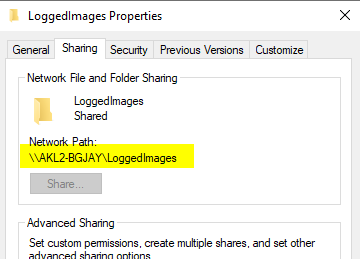
- Go to the Sharing tab and click on Advanced Sharing... Tick the Share this folder box.
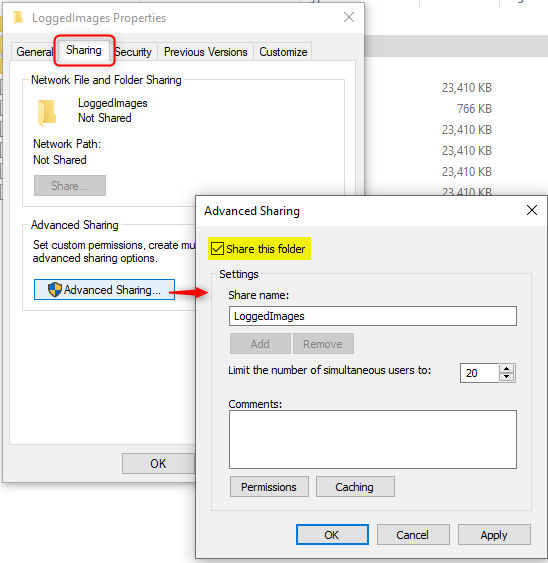
- Click on Permissions and select Full Control.
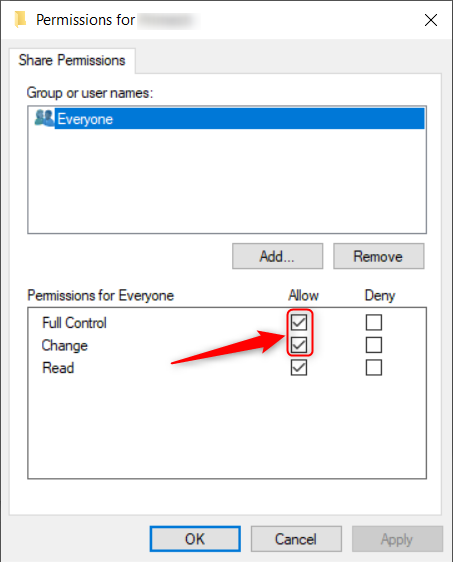
- Copy the Network Path to this folder into your clipboard.
- Start the FHV7/FH then open the System Settings menu.

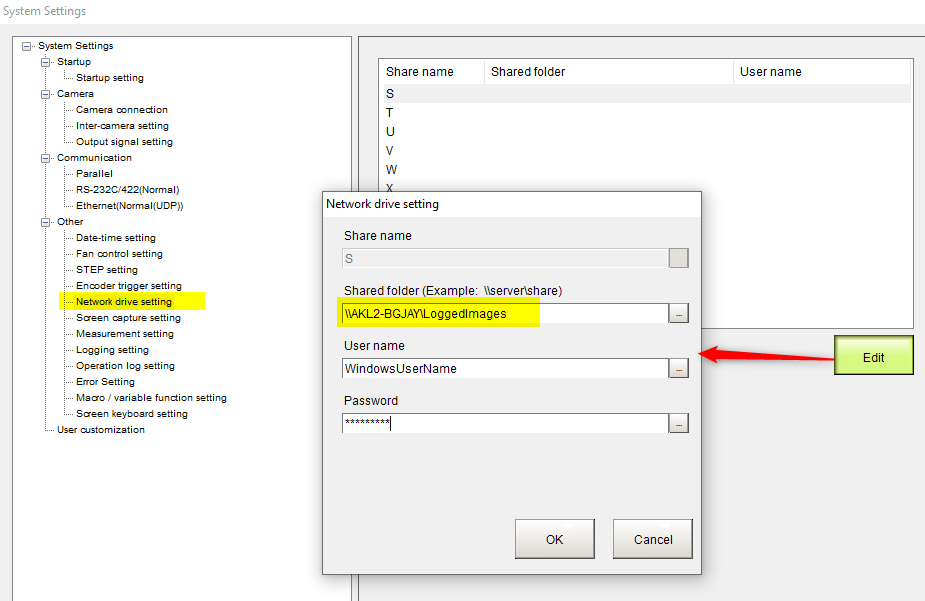
- Go to the Network Drive settings section. Select a drive letter and click Edit. Enter the Network Path from step 4. Enter the PC Windows' user name and password.
Note: to find your Window user name, open the search bar and type "your info". The user name is the full path on the second line.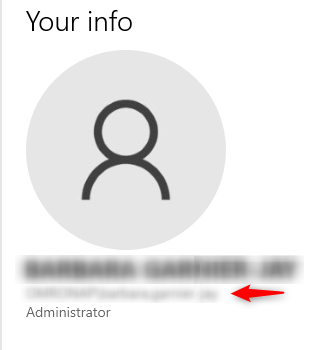
- Click Apply, Data Save and reboot the FHV7/FH.
- Start the FHV7/FH then open the System Settings menu.
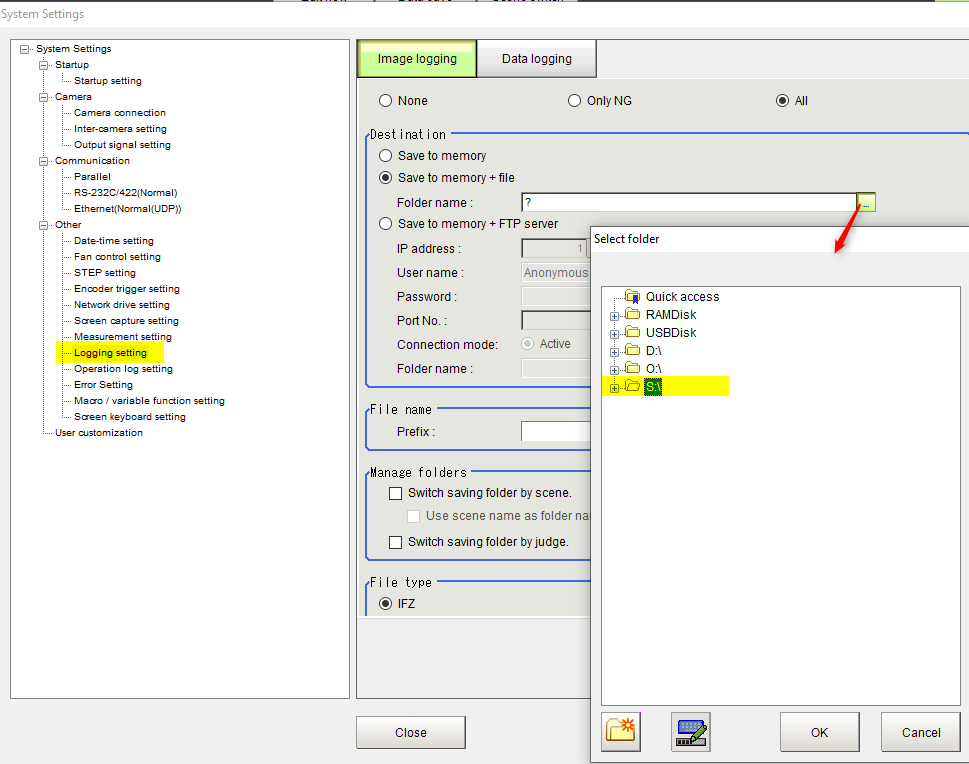
- Go to the Logging setting section. The network folder now appears as a logging destination.
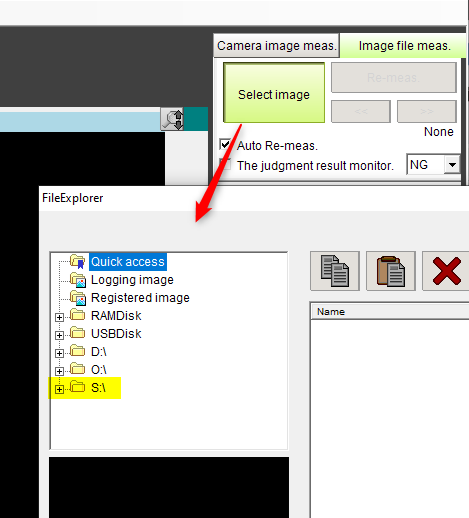
- Similarly, the network folder will appear in the Image file measurement window.
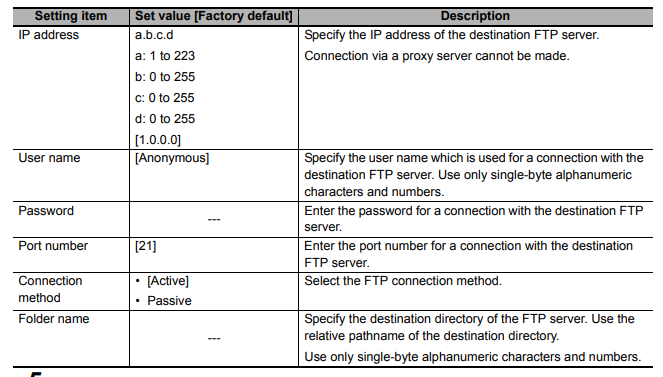
Logging via FTP
- Select "Image Logging" tab in "Logging Setting" of System Settings and select "Save to Memory + FTP Server"
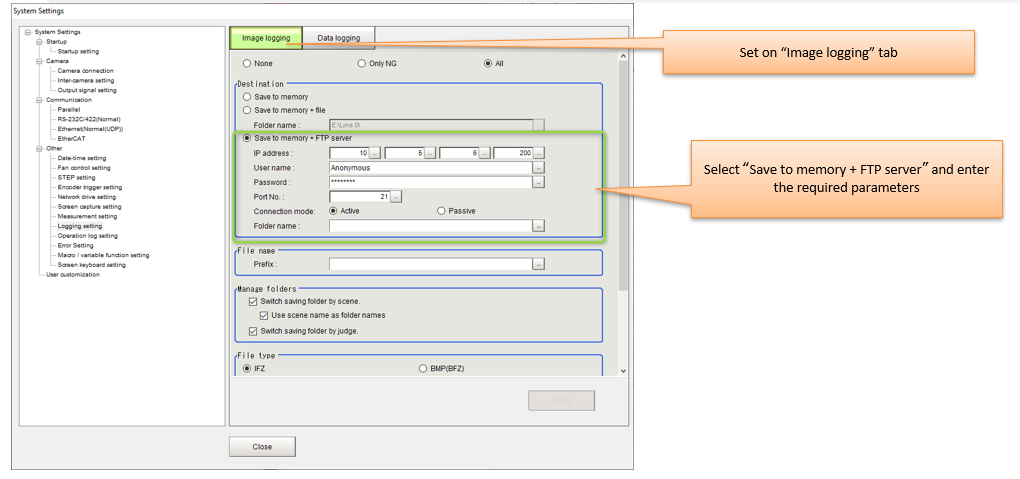
- Set the various parameters needed and set the 'Apply" button: